
The 6 Gallon Atwood water heater wiring diagram can be found in the product manual for easy installation. It provides the exact steps and connections required for the wiring process.
A water heater is an essential component in most homes, providing hot water for various needs. The 6 Gallon Atwood water heater is a popular choice due to its reliability and efficiency. However, the wiring process can be complex, and having access to the wiring diagram is crucial for a seamless installation.
By following the diagram and adhering to the manufacturer’s instructions, homeowners can ensure that the water heater is wired correctly, minimizing the risk of electrical issues. We will explore the importance of the wiring diagram, and provide a concise guide for installing the 6 Gallon Atwood water heater.
Page Contents
Identifying Components And Safety Precautions
When it comes to installing or repairing a 6 Gallon Atwood Water Heater, understanding the wiring diagram is crucial. This not only helps in identifying the components but also ensures necessary safety precautions are taken for a successful installation. Let’s delve into the anatomy of the water heater and the safety measures to consider before starting the installation process.
Understanding The Anatomy Of The Water Heater
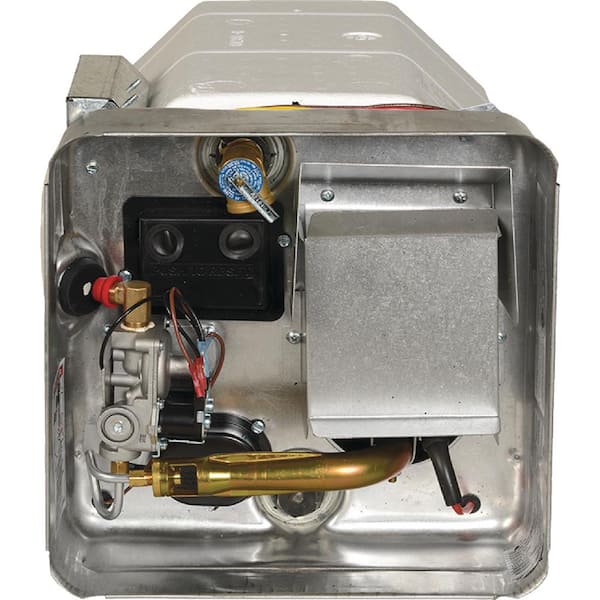
The 6 Gallon Atwood Water Heater has several key components that make up its wiring system. These include the thermostat, heating elements, power connections, and safety features such as high-limit switches and pressure relief valves. Each component is essential for the proper functioning of the water heater, and understanding their roles is vital for safe and effective installation.
Necessary Safety Measures Before Starting Installation
Prior to beginning the installation process, it is essential to adhere to important safety measures to prevent accidents and ensure the longevity of the water heater. Some necessary safety precautions include:
- Turn off the power supply: Ensure that the power supply to the water heater is completely turned off before beginning any installation or repair work.
- Use insulation: Always use appropriate insulation materials for the wiring to avoid any accidental electrical shocks.
- Check for leaks: Before proceeding with the installation, thoroughly inspect the water heater and its components for any signs of leakage or damage.
- Refer to the manual: Always refer to the manufacturer’s manual for specific safety precautions and installation instructions to avoid any mishaps.
By understanding the anatomy of the 6 Gallon Atwood Water Heater and adhering to necessary safety measures, you can ensure a smooth and secure installation process.
Gathering Tools And Materials
Before starting with the wiring process of your 6 Gallon Atwood Water Heater, it’s essential to have all the necessary tools and materials at your disposal. Getting everything ready beforehand will ensure a seamless installation and minimize any potential hiccups along the way.
Essential Tools Required For The Wiring Process
- Wire Strippers: To strip and cut wires to the required length.
- Electrical Tape: For insulating wire connections.
- Screwdriver Set: Both flat-head and Phillips screwdrivers for fastening electrical connections.
- Multimeter: To measure voltage and check for continuity.
- Drill and Bits: For creating holes when mounting the water heater.
- Adjustable Wrench: For tightening connections and fittings.
Required Materials For A Seamless Installation
- Wire connectors: Assortment of connectors for secure wire splicing.
- Electrical Wire: High-quality wires suitable for the water heater’s electrical requirements.
- Mounting Hardware: Bolts, screws, and brackets for securely mounting the water heater.
- Instruction Manual: Ensure you have the manufacturer’s guide for reference throughout the installation process.
- Protective Gear: Safety goggles and gloves to protect yourself during the installation.
Connecting Power Supply
When it comes to connecting the power supply to your 6-gallon Atwood water heater, it’s crucial to ensure that the wiring is done correctly to prevent electrical hazards and ensure optimal performance. Following the proper wiring diagram and guidelines for connecting the power supply is essential for a safe and efficient operation of your water heater.
Properly Connecting The Power Source To The Water Heater
Before beginning the wiring process, it’s important to gather all the necessary tools and equipment, including wire connectors, wire strippers, and a voltage tester. Ensure that the power supply is turned off and verify that there is no electricity flowing to the water heater before proceeding.
Ensuring Correct Voltage And Ampere Rating
Check the specifications provided in the 6-gallon Atwood water heater wiring diagram to ensure that the power supply meets the recommended voltage and ampere rating. Using the incorrect voltage or amperage could lead to damage to the water heater and pose a safety risk. Always adhere to the manufacturer’s recommendations for voltage and ampere requirements.
Thermostat And Heating Element Wiring
Proper wiring of the thermostat and heating element is crucial to ensure the optimal performance of your 6-gallon Atwood water heater. By understanding the electrical connections for these components, you can maintain the right temperature control and efficient functioning of the heating system. Let’s delve into the specifics of wiring the thermostat and connecting the heating element to ensure effective operation.
Wiring The Thermostat For Optimal Temperature Control
The thermostat in the Atwood water heater plays a critical role in regulating the temperature of the water. Proper wiring of the thermostat is essential for maintaining the desired water temperature and preventing overheating or underheating issues. When connecting the thermostat, it’s important to adhere to the manufacturer’s wiring diagram to ensure accurate placement of the terminals and wire connections. By following the recommended wiring guidelines, you can achieve optimal temperature control and efficient energy usage.
Connecting The Heating Element To Ensure Efficient Functioning
The heating element is responsible for heating the water stored in the tank of the Atwood water heater. When connecting the heating element, it’s crucial to pay attention to the correct wiring and electrical connections. It’s recommended to use high-quality wiring materials and connectors to ensure a secure and efficient electrical connection. By ensuring proper wiring of the heating element, you can facilitate effective heat transfer and maintain consistent hot water supply.
Verifying The Wiring Setup
When it comes to verifying the wiring setup for your 6 Gallon Atwood water heater, it’s crucial to ensure that the connections are set up correctly for functionality and safety. This process involves testing the connections for functionality and safety, as well as troubleshooting common wiring issues that may arise.
Testing The Connections For Functionality And Safety
First and foremost, it’s essential to test the connections of the 6 Gallon Atwood water heater to ensure that they are functional and safe. This involves checking the wiring diagram to verify that each wire is connected to the appropriate terminal. Additionally, a voltage tester should be used to confirm that there is a proper electrical connection and that there are no loose connections or exposed wires that could pose a safety hazard.
Moreover, testing the functionality of the connections involves turning on the water heater to verify that it operates as expected. This includes checking that the heating element is receiving power, and the thermostat is functioning correctly to maintain the desired water temperature.
Troubleshooting Common Wiring Issues
If any issues arise during the testing process, it’s crucial to troubleshoot common wiring problems that may occur with the 6 Gallon Atwood water heater. This may include identifying and resolving issues such as loose connections, corrosion on terminals, or damaged wiring. Furthermore, ensuring that the wiring meets the manufacturer’s specifications and adheres to local building codes is paramount for safety and proper functionality.
Inspecting The Over-all Installation
Inspecting the over-all installation of the 6 Gallon Atwood Water Heater is crucial to ensure its proper and safe functioning. This section will guide you through the steps to ensure all components are securely installed and provide maintenance tips for long-term performance.
Ensuring All Components Are Securely Installed
When inspecting the installation of the 6 Gallon Atwood Water Heater, it’s vital to ensure that all components are securely installed. Check for any loose connections, leaks, or signs of wear and tear. Pay close attention to the wiring diagram and make sure that the wiring is properly connected and insulated to prevent any electrical hazards.
Maintenance Tips For Long-term Performance
To ensure the long-term performance of the water heater, regular maintenance is essential. Here are some tips for maintaining the 6 Gallon Atwood Water Heater:
- Inspect the anode rod annually and replace it if more than 50% of its core is corroded.
- Flush the tank at least once a year to remove sediment buildup.
- Check the pressure relief valve for proper operation and replace it every few years as per the manufacturer’s recommendations.
- Monitor the burner and clean it if there is any soot or debris accumulation.
- Regularly check for any signs of water leaks and address them promptly.
Credit: www.homedepot.com
Conclusion
In the modern RV industry, understanding the wiring diagram of the 6-gallon Atwood water heater is essential for safe and efficient usage. By following this guide, you can ensure the proper installation and maintenance of your water heater, leading to a seamless camping experience.
With this knowledge, you can confidently troubleshoot any electrical issues that may arise, allowing you to enjoy your travels worry-free.