
To connect PEX to a water heater, use a PEX fitting compatible with your heater’s inlet and outlet. Secure the connections with stainless steel clamps or crimp rings.
PEX tubing offers a flexible and durable solution for modern plumbing systems. Connecting PEX to a water heater requires specific fittings and tools to ensure a secure and leak-free connection. The process involves attaching PEX fittings to the water heater’s inlets and outlets, then securing the connections with stainless steel clamps or crimp rings.
This method provides a reliable and efficient way to integrate PEX into your plumbing system, delivering hot water throughout your home. Ensure you have the right materials and follow safety guidelines to achieve the best results.
Page Contents
- 1 Introduction To Pex Piping install water heater
- 2 Types Of Water Heaters
- 3 Tools And Materials To installing water heater with pex
- 4 Safety Precautions Before Starting to Connect Pex to Water Heater
- 5 Preparing The Pex Tubing to connect pex tubing
- 6 Connecting Pex To The Water Heater – install water heater using pex
- 7 Testing For Leaks
- 8 Insulation And Final Touches On installing water heater with pex
- 9 Maintenance Tips pex to tankless water heater
- 10 Troubleshooting Common Issues using pex on water heater
- 11 FAQs pex on water heater
- 12 Recap
Introduction To Pex Piping install water heater
PEX piping is a type of plastic tubing. It is flexible and easy to install. PEX stands for cross-linked polyethylene. PEX pipes can handle hot and cold water. They resist corrosion and scale buildup. This makes them a good choice for plumbing systems.
PEX pipes are cheaper than copper pipes. They are easy to cut and join. PEX can bend around corners. This reduces the number of joints needed. Fewer joints mean fewer chances for leaks. PEX is also quieter than metal pipes.
| Property | PEX | Copper |
|---|---|---|
| Flexibility | Very High | Low |
| Cost | Low | High |
| Corrosion Resistance | High | Moderate |
| Installation Ease | Easy | Difficult |
Types Of Water Heaters
Water heaters come in two main types. Tank systems store hot water in a large container. Tankless systems heat water on demand. Tank systems can run out of hot water. Tankless systems provide endless hot water. Tank systems are usually cheaper upfront. Tankless systems save more energy in the long run.
Water heaters use different energy sources. Electric water heaters are common and easy to install. Gas water heaters heat water faster and cost less to run. Solar water heaters use the sun’s energy, which is free. Heat pump water heaters are very efficient and save money over time.
Tools And Materials To installing water heater with pex
Before starting, gather all the necessary tools. You’ll need a PEX cutter to make clean cuts. A crimp tool helps secure the fittings. Don’t forget the crimp rings for a tight seal. Use a de-burring tool to smooth the edges. A measuring tape ensures accurate lengths. PEX tubing is essential for the connection. A marker helps in marking cut points. You might need an adjustable wrench for tightening connections. Safety gloves protect your hands. A bucket can catch any water spills.
Choosing the right PEX fittings is important. Brass fittings are durable and reliable. Plastic fittings are lightweight and cost-effective.
Upgrade Your Water Heater Fast – PEX Fittings in Stock Now!
Find the perfect PEX fittings for your water heater effortlessly on Amazon. Our curated selection ensures secure, durable connections, making installation a breeze!
Push-fit fittings are easy to install and remove. Crimp fittings require crimp rings and tools. Expansion fittings expand the PEX for a snug fit. Make sure to choose fittings that match your PEX tubing size. Always check for certified and high-quality fittings.
Safety Precautions Before Starting to Connect Pex to Water Heater
Ensure the power supply to the water heater is off. Turn off the main water valve before starting. Wear safety gloves and goggles to protect yourself.
#1: Shutting Off The Water Supply
Ensure the water supply is completely shut off. Locate the main water valve. Turn the valve clockwise to stop the flow of water. Verify no water is flowing by checking a nearby faucet. This step is crucial to prevent water damage.
#2: Draining The Water Heater
Attach a garden hose to the drain valve of the water heater. Place the other end of the hose in a drain or outside. Open the drain valve to let the water flow out. Allow the water heater to fully drain. This ensures safe handling of the heater.
Preparing The Pex Tubing to connect pex tubing
Start by measuring the distance from the water heater to the desired location. Use a marker to mark the length on the PEX tubing. Use a PEX tubing cutter for a clean cut. Make sure the cut is straight. This ensures a good fit with the fittings. Double-check the length before cutting. It’s better to measure twice.
Take an expansion tool to expand the PEX tubing. Insert the tool into the tubing. Squeeze the handle to expand it. This creates space for the fitting. Quickly insert the fitting into the expanded tubing. Allow the tubing to contract around the fitting. This forms a strong, leak-proof seal. Make sure the fitting is secure.
Credit: www.reddit.com
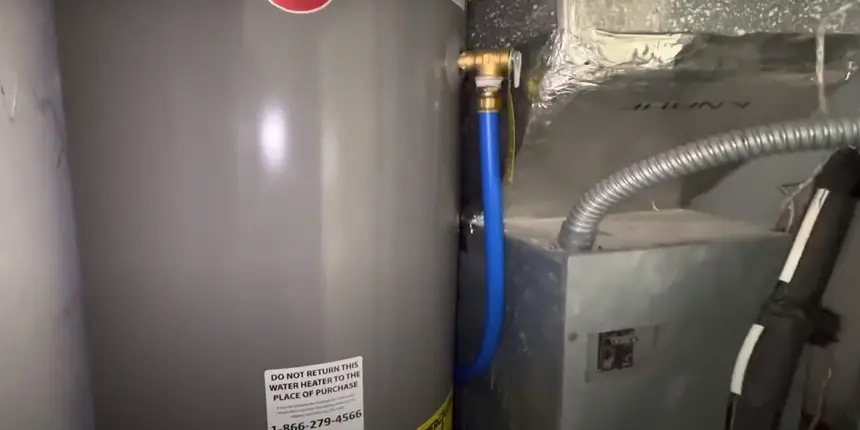
Connecting Pex To The Water Heater – install water heater using pex
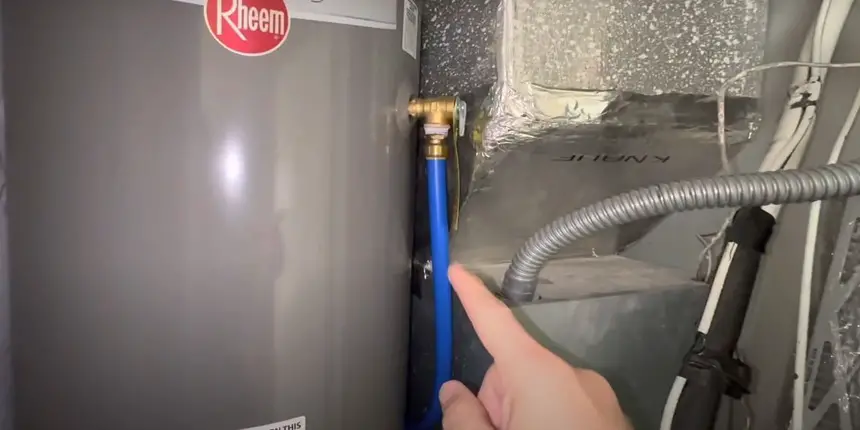
First, turn off the water supply. Make sure to drain the water heater. Cut the PEX tubing to the required length. Attach one end to the inlet of the water heater. Use a crimp ring or clamp to secure it. Do the same for the outlet. Always double-check the connections.
Crimp rings are easy to use. Slide a crimp ring over the PEX tubing. Insert the fitting into the tubing. Use a crimp tool to secure the ring. Clamps are also an option. Slide the clamp over the tubing. Insert the fitting, then use a clamp tool to tighten. Ensure there are no leaks by turning the water back on. Inspect each connection carefully.
Testing For Leaks
First, turn off the water supply. Attach a pressure gauge to the line. Slowly open the valve to let water in. The gauge should read the correct pressure. Watch the gauge for a few minutes. Any drop in pressure could mean a leak. Fix any leaks you find before moving on.
Look at all the connections closely. Check for water droplets or wet spots. Feel around joints for any moisture. Use a dry cloth to wipe connections and check for wetness. Even a small leak can cause big problems. Make sure everything is completely dry before finishing.
Insulation And Final Touches On installing water heater with pex
Installing PEX to a water heater involves insulating pipes and making secure connections. Ensure fittings are tight for optimal performance.
Insulating Pex Pipes
Insulating PEX pipes can save energy. Wrap foam sleeves around the pipes. This keeps water hot for a longer time. Use tape to secure the foam in place. Insulation also protects pipes from freezing in cold weather. Cut the foam to fit around bends and corners. Ensure there are no gaps. Proper insulation helps your water heater work more efficiently.
Labeling And Documentation
Label each pipe clearly. Use waterproof markers for labeling. This helps identify hot and cold water lines. Keep a record of the installation. Note down the date and any important steps. Documentation can be useful for future repairs. Labels and records make maintenance easier.
Maintenance Tips pex to tankless water heater
Connecting PEX to a water heater requires proper tools and materials. Ensure secure fittings and follow safety guidelines for a leak-free installation.
Routine Check-ups
Inspect the PEX tubing for any signs of wear or damage. Look for leaks around the water heater connection. Tighten any loose connections to prevent leaks. Ensure that there are no kinks in the tubing. Check the pressure relief valve for proper function. Make sure the water heater is set to the correct temperature. Clean the area around the water heater regularly to prevent dust buildup. Replace any damaged or worn parts immediately.
When To Replace Pex Tubing
Replace PEX tubing if you notice cracks or discoloration. Replace tubing that has lost its flexibility. If the tubing has been exposed to direct sunlight, it may need replacing sooner. Leaks are a sign that replacement is necessary. Check the manufacturer’s guidelines for the tubing’s lifespan. Always use new fittings when replacing old tubing. Regularly inspect the tubing for any signs of wear and tear.
Troubleshooting Common Issues using pex on water heater
Connecting PEX to a water heater often involves ensuring the right fittings and tools are used. Secure connections prevent leaks and maintain efficiency. Proper installation enhances water flow and system longevity.
Dealing With Leaks
Leaks are common with Pex connections. Check all fittings for tightness. Use Teflon tape on threads for a better seal. Inspect for cracks in the Pex tubing. Replace damaged sections if needed. Regularly monitor connections to catch leaks early.
Temperature Fluctuations
Temperature changes can affect Pex pipes. Ensure your water heater is set to the correct temperature. Install a mixing valve to balance hot and cold water. Insulate Pex pipes to maintain temperature. Check for clogs in the system. Flush the water heater to remove sediment build-up. This helps keep temperature stable.
FAQs pex on water heater
Can You Connect Pex Directly To A Water Heater?
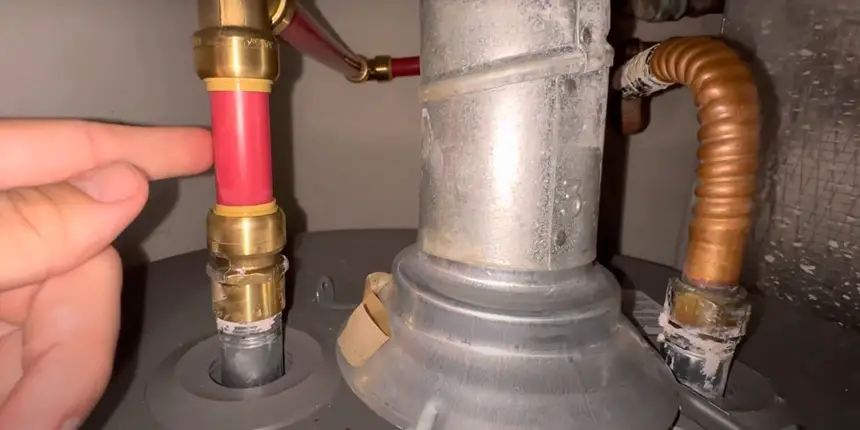
No, you can’t connect PEX directly to a water heater. Use a copper or steel transition fitting. This prevents heat damage to the PEX tubing. Ensure proper installation to avoid leaks.
How Close Can Pex Be To A Water Heater Vent?
PEX should be at least 6 inches away from a water heater vent. Ensure proper clearance to prevent heat damage.
Where Is Pex Not Allowed?
PEX is not allowed in areas exposed to UV light, high heat, or where local codes prohibit its use. Always check local building regulations.
Can Pex Be Used For Water Heater Discharge Pipe?
PEX is not recommended for water heater discharge pipes. Use materials like copper or CPVC for safety and compliance.
Recap
Mastering the connection of PEX to your water heater is essential for efficient plumbing. Follow the steps carefully to ensure a secure and leak-free connection. With these guidelines, you can confidently handle the task. Enjoy the benefits of a reliable and durable water heating system with PEX.