
If you have a tankless water heater at home, protecting it from leaks is crucial. A drain pan can be your best defense against water damage, saving you from costly repairs and headaches.
But how do you install one correctly? You’ll discover simple, step-by-step guidance to install a tankless water heater drain pan the right way. By the end, you’ll feel confident that your water heater is safe and secure. Keep reading to learn how a small addition can make a big difference for your home’s safety.
Credit: www.icecreamfactoryny.com
Page Contents
Choosing The Right Drain Pan
Choosing the right drain pan for a tankless water heater is important. It protects your home from water damage. The right pan fits well and works with your heater. It also helps direct water safely to a drain. This section covers key points to consider before buying a drain pan.
Material Options
Drain pans come in different materials like plastic, metal, and steel. Plastic pans are light and resist rust. Metal pans are strong but may rust over time. Stainless steel pans last longer and resist corrosion. Choose a material that suits your environment and budget.
Size And Dimensions
Measure your water heater before buying a drain pan. The pan should be large enough to catch leaks. Check the height and width for a perfect fit. A pan that is too small may not protect well. Pick one with enough depth to hold water safely.
Compatibility With Heater Models
Not all drain pans fit every tankless water heater. Check the heater’s model and brand first. Some manufacturers recommend specific pans for their units. Using a compatible pan ensures proper drainage and safety. Always follow the heater’s installation guidelines.
Tools And Materials Needed
Installing a drain pan for your tankless water heater needs the right tools and materials. These help ensure the job is done correctly and safely. Having everything ready makes the process faster and smoother.
Essential Tools
You will need a drill to make holes for screws. A screwdriver helps to secure the pan and brackets. A tape measure is important for correct placement. Use a level to keep the pan even. A wrench or pliers will help tighten bolts and fittings. A utility knife is handy for cutting materials.
Recommended Materials
Choose a drain pan that fits your water heater size. PVC piping directs water from the pan to a drain. Use pipe connectors and elbows to join pipes. Waterproof sealant prevents leaks around fittings. Screws and brackets hold the pan firmly in place. Teflon tape ensures tight pipe connections.
Safety Gear
Wear safety glasses to protect your eyes from debris. Gloves guard your hands from sharp edges and chemicals. A dust mask keeps you safe from inhaling dust. Ear protection is useful when drilling or cutting. Proper clothing prevents injuries and keeps you comfortable.
Preparing The Installation Area
Preparing the installation area is a key step for a tankless water heater drain pan. A clean and ready space makes the job easier and safer. It helps to avoid problems later. Follow simple steps to prepare well before starting the installation.
Clearing The Space
Remove any objects near the water heater area. Boxes, tools, or dust can get in the way. Keep the space open for easy movement. A clear area prevents accidents and damage to the drain pan. Also, it helps to see the plumbing and floor clearly.
Checking For Level Surface
Check if the floor is flat and even. A level surface is important for the drain pan to work correctly. Use a level tool to test the floor. Fix small dips or bumps with a patch or shim. This stops water from pooling in the wrong place.
Inspecting Plumbing Connections
Look at the pipes and fittings near the heater. Make sure there are no leaks or rust. Tighten loose connections or replace old parts. Clean the area around pipes for a good seal. Proper plumbing helps the drain pan catch water safely.

Credit: rectorseal.com
Installing The Drain Pan
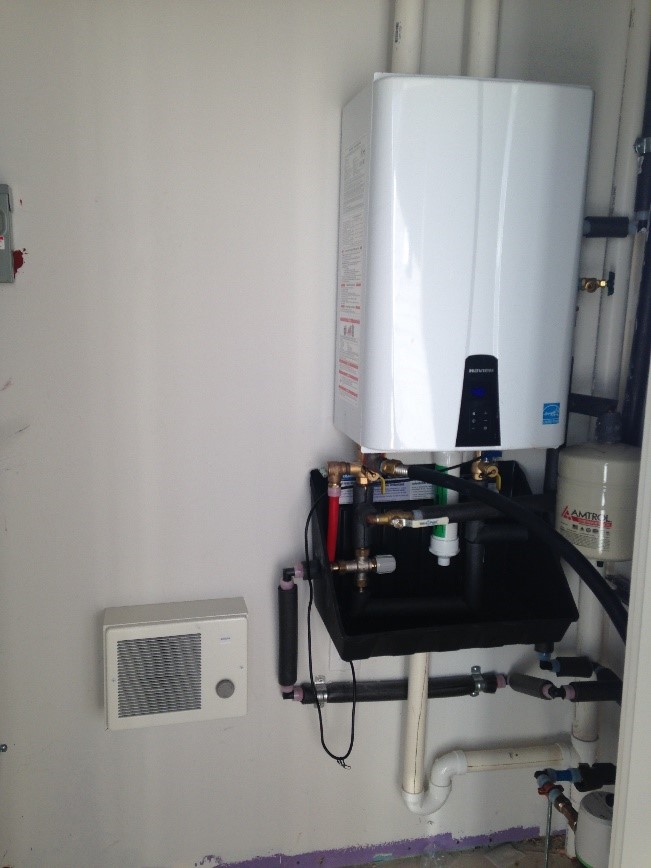
Installing a drain pan under a tankless water heater protects your home from water damage. It catches leaks or drips that might happen. Proper installation ensures the pan works well and lasts long. Follow clear steps to position, secure, and connect the drain pan correctly.
Positioning The Pan
Place the drain pan directly under the water heater. Make sure it covers the entire base of the unit. The pan should sit flat on the floor without rocking. Check that it does not block any vents or pipes. Position it near a drain or a safe place for water to flow.
Securing The Pan
Use screws or brackets to fix the pan in place. Secure it to the floor or wall to stop movement. Avoid over-tightening, which can crack the pan. The pan must stay stable during heater operation. A stable pan prevents spills and accidents.
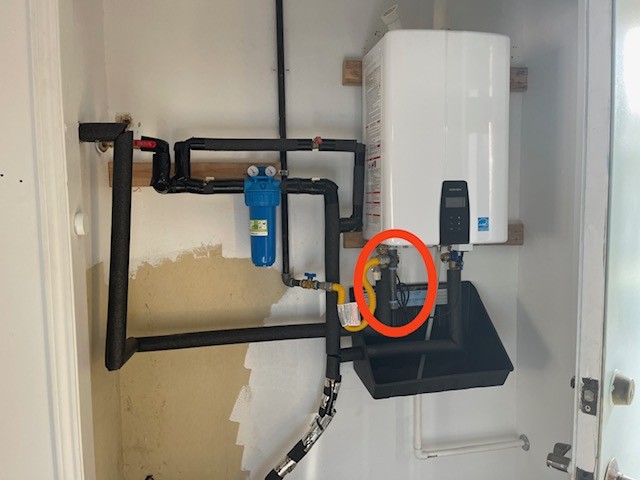
Connecting The Drain Line
Attach a drain line to the pan’s outlet hole. Use a hose or pipe that fits tightly. Direct the line to a floor drain or outside. Ensure the slope allows water to flow easily. Seal all connections to avoid leaks or clogs.
Testing The Drain Pan Setup
Testing the drain pan setup is a crucial step after installing a tankless water heater. It ensures the pan can catch and direct any water leaks safely. Proper testing helps avoid water damage and costly repairs later. Follow these checks to confirm your drain pan works perfectly.
Leak Checks
Start by inspecting all connections around the drain pan. Look for any signs of moisture or drips. Use a dry cloth to wipe around the pan edges and fittings. Check the pan itself for cracks or holes. A small leak can cause big problems. Fix any issues before moving forward.
Drainage Flow Test
Pour a small amount of water into the drain pan. Watch how the water moves toward the drain pipe. It should flow smoothly without pooling or backing up. The drain pipe must carry water away quickly. If water stays in the pan, clear any blockages or adjust the slope.
Final Adjustments
Make sure the pan sits level and stable under the heater. Tighten loose fittings and secure the drain pipe. Confirm the drain pipe leads to a safe place, like a floor drain or sump pit. Double-check for leaks after adjustments. A well-tested drain pan protects your home from water damage.
Credit: www.icecreamfactoryny.com
Maintenance Tips For Drain Pans
Maintaining the drain pan of a tankless water heater is important. It helps avoid water damage and keeps the heater working well. Simple steps can keep the drain pan in good shape for years.
Regular Cleaning
Clean the drain pan often to remove dirt and debris. Use a soft cloth or sponge with mild soap. Avoid harsh chemicals that can damage the pan. Clean pans prevent mold and bad smells. Make cleaning part of your regular home care routine.
Inspecting For Damage
Look at the drain pan for cracks or rust. Check the edges and corners closely. Small damage can cause leaks and bigger problems. Replace or repair the pan if you see any damage. Regular checks catch problems early and save money.
Preventing Clogs
Keep the drain line clear to avoid clogs. Remove any leaves, hair, or dust near the drain. Flush the drain line with water to clear blockages. A clear drain helps water flow freely and stops overflow. Preventing clogs protects your home from water damage.
Conclusion
Installing a drain pan under your tankless water heater protects your home. It catches leaks early and stops water damage. This small step saves money on repairs later. Choosing the right pan and placing it correctly is important. Regular checks keep the system safe and working well.
Protect your investment with a simple, smart drain pan. Safety and peace of mind are worth it.