
A water heater leaking from the top vent typically indicates a problem with the pressure relief valve or loose connections. Addressing this issue promptly can prevent water damage and further complications.
Water heaters are essential for daily comfort, providing hot water for showers, dishes, and laundry. A leaking water heater can disrupt your routine and pose risks to your home. Identifying the source of the leak is crucial for effective repairs.
Common causes include faulty pressure relief valves, loose fittings, or condensation issues. Ignoring these signs can lead to more severe damage and costly repairs. Regular maintenance and prompt attention can extend the lifespan of your water heater and enhance efficiency.
Page Contents
- 1 Identifying why hot water heater leaking from top vent
- 2 Safety Precautions Before Repair Leaking from Top Vent
- 3 Initial Troubleshooting Steps water heater leaking top connections
- 4 Tightening Loose Connections
- 5 Replacing Faulty Valves
- 6 Sealing Leaks With Epoxy – water leak under hot heater
- 7 Installing New Venting Pipes
- 8 Preventive Measures For Future Leaks
- 9 Frequently Asked Questions
- 10 Conclusion
Identifying why hot water heater leaking from top vent
#1: Start by checking the top vent of your water heater. Look for any water droplets or signs of moisture. Pay attention to the area around the vent cap. This is a common spot for leaks.
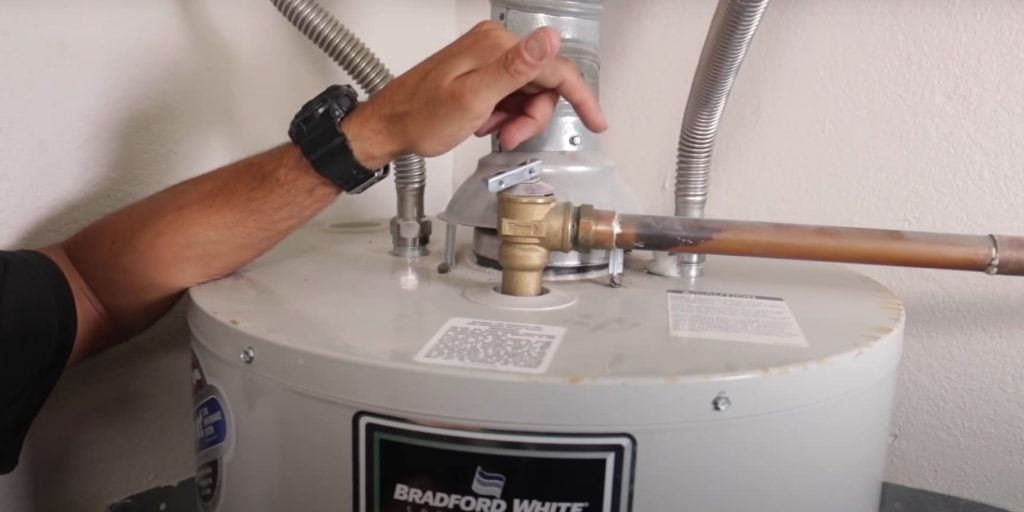
#2: Next, inspect the flue pipe. Ensure it is connected properly. Look for any cracks or gaps in the pipe. These can cause water to escape.
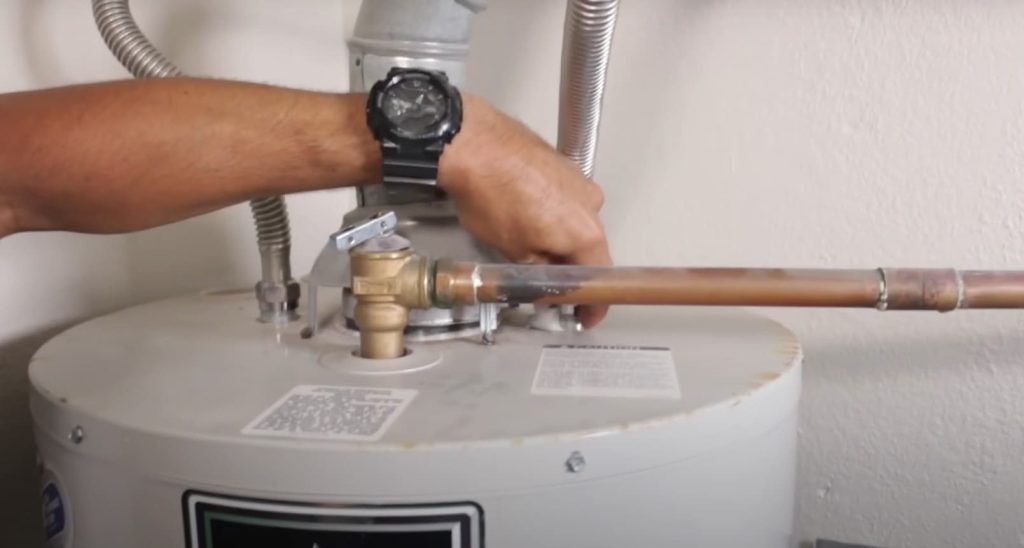
#3: Examine the connections at the top of the heater. Check for loose fittings or damaged seals. These issues often lead to leaks.
#4: Lastly, inspect the pressure relief valve. If it is faulty, it can release water. Make sure to check these areas carefully.
Safety Precautions Before Repair Leaking from Top Vent
Turn off the power to your water heater. This keeps you safe during repairs. Find the circuit breaker and switch it off.
Shut down the water supply to prevent further leaking. Locate the main valve and turn it clockwise. Make sure to check for any leaks after shutting off.
Taking these safety precautions is very important. It protects you and your home from damage. Always follow these steps before starting any repair work.
Initial Troubleshooting Steps water heater leaking top connections
Start by wiping down the area around the water heater. This helps to identify the source of the leak. Look for water stains or damp spots on the walls and floor.
Next, check for obvious damage on the water heater. Inspect the top vent and connections. Look for cracks, loose fittings, or rust. Any of these issues can cause leaks.
If no damage is visible, check the vent pipe for blockages. Ensure proper airflow to avoid condensation. A clogged vent can lead to water buildup.
Always remember to turn off the power and water supply before inspecting. Safety is crucial during any repairs.

Credit: www.reddit.com
Tightening Loose Connections
Check the connections on the top vent of your water heater. A loose connection can cause leaks. Use the right tools to fix this issue.
Tools Needed include:
- Adjustable Wrench
- Screwdriver
- Plumber’s Tape
- Bucket
Follow these steps to tightening Loose Connection:
- Turn off the water heater power.
- Shut off the water supply to the heater.
- Place a bucket under the vent.
- Tighten any loose connections with the wrench.
- Use plumber’s tape for better sealing.
- Turn on the water supply and check for leaks.
Replacing Faulty Valves
Identifying valve issues is important for fixing leaks. Look for water pooling around the valves. Check for rust or corrosion on the surface. Listen for any hissing sounds, which may indicate air leaks.
Find Out Water Heater Valve
Looking for a water heater valve? The right valve depends on your heater type (electric or gas) and its needs. Consider size, pressure rating, and material for the best fit.
To replace faulty valves, first, turn off the water supply. Then, drain the tank to avoid spills. Use a wrench to remove the old valve. Clean the threads before installing a new one. Finally, tighten the new valve securely.
Sealing Leaks With Epoxy – water leak under hot heater
Sealing leaks in your water heater is crucial. Choose the right epoxy to fix the problem. Look for water-resistant and heat-resistant options. These qualities ensure long-lasting repairs.
Application techniques matter for effective sealing. First, clean the area around the leak. Remove any dirt or rust. Then, mix the epoxy according to the instructions. Apply it evenly on the affected area.
Press firmly to ensure a tight seal. Allow the epoxy to cure as per the product guidelines. After curing, check for any remaining leaks. A good seal can save you from future issues.
Installing New Venting Pipes
Removing old venting pipes is the first step. Start by turning off the water heater. Carefully detach the old pipes. Check for any rust or damage. Dispose of the old pipes properly.
Next, measure the length needed for the new pipes. Make sure to buy durable materials. Stainless steel or PVC pipes work well. Cut the new pipes to fit your measurements.
Attach the new pipes securely. Use pipe tape for a tight seal. Check for any leaks after installation. Proper venting is essential for safety.
Ensure Proper Venting for Your Heater – Shop Now!
Need a vent pipe? Gas heaters need a vent (stainless steel or PVC), while electric heaters don’t. Choose the right size and material.
Preventive Measures For Future Leaks

To prevent leaks, regular maintenance is key. Check the pressure relief valve every six months. This valve helps control pressure inside the tank.
Flush the tank at least once a year. This removes sediment buildup. Sediment can cause overheating and leaks.
Inspect the insulation around the vent. Damaged insulation can lead to condensation and leaks. Replace any worn-out parts promptly.
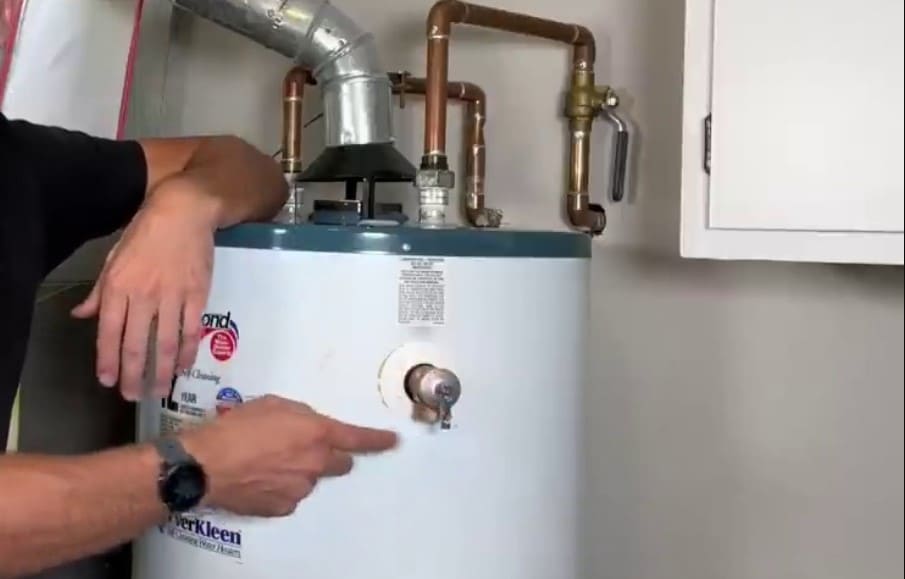
Monitor the temperature setting. Keeping it at 120°F can prevent excessive pressure. A lower setting helps avoid scalding accidents.
Be aware of water stains or puddles near the heater. These signs indicate a potential problem. Address issues quickly to prevent further damage.
Call a professional plumber if you notice persistent leaks. They can identify and fix underlying issues safely.
Frequently Asked Questions
Why Is My Hot Water Heater Leaking From The Vent?
A hot water heater leaking from the vent usually indicates a condensation issue or a blocked vent. Excess moisture can accumulate and drip out. Check for vent obstructions and ensure proper insulation. If the problem persists, consult a professional for repairs to avoid further damage.
Why Does A Water Heater Leak From The Top?
A water heater leaks from the top due to loose connections, faulty valves, or corrosion. High pressure or temperature can also cause leaks. Regular maintenance helps identify these issues early, preventing significant damage and costly repairs. Always consult a professional for persistent leaks.
Why Is My Hot Water System Leaking From The Top Cap?
A hot water system may leak from the top cap due to a faulty pressure relief valve or loose connections. Overheating can also cause excessive pressure, leading to leaks. Regular maintenance can help identify and fix these issues before they escalate.
Always consult a professional for repairs.
Why Is My Heater Vent Dripping Water?
Heater vents may drip water due to condensation. This often occurs when warm air meets cold surfaces. Clogged drainage lines or improper insulation can also cause leaks. Regular maintenance helps prevent these issues and ensures efficient heating. Addressing the root cause will stop the dripping.
Conclusion
A leaking water heater from the top vent can lead to significant issues. Timely detection and repair are crucial to avoid further damage. Regular maintenance can help prevent leaks and extend your water heater’s lifespan. Always consult a professional for persistent problems to ensure safety and efficiency.
Your home deserves the best care.