
If water heater insulation gets wet, immediately turn off the power and gas supply to the water heater. Then, carefully remove and replace the wet insulation to prevent any damage to the water heater and maintain its efficiency.
Wet insulation can lead to decreased efficiency and even cause damage to the water heater if not addressed promptly.
When dealing with wet water heater insulation, prompt action is necessary to prevent any possible injury to the unit. We will discuss the steps to take if your water heater insulation gets wet, as well as provide tips on preventing this issue in the future.
Page Contents
What Happens If My Hot Water Heater Gets Wet?
It is essential to keep an eye out for any signs of insulation damage to ensure the optimal performance of your water heater.
Visual Inspection
Perform a visual inspection of the water heater insulation material.
Look for any visible signs of damage such as tears, rips, or discoloration.
Check for any areas where the insulation may have become wet or compressed, as these could indicate potential damage.
Dampness Or Moisture
One of the primary indicators of water heater insulation damage is dampness or moisture on the insulation material.
Feel for any areas of the insulation that seem damp to the touch. Note that moisture can lead to reduced insulation effectiveness and potential damage to the water heater itself.
Mold Or Mildew Growth
Another clear sign of water heater insulation damage is the presence of mold or mildew growth on the insulation material.
Look for any areas where mold or mildew may be thriving, as this can indicate a moisture issue that needs to be addressed promptly.
Mold and mildew can also pose health risks, so it’s essential to address this issue as soon as possible.
Drying Out The Insulation – How Long Does It Take For A Water Heater To Dry Out
When water heater insulation becomes wet, it’s essential to dry it out promptly to prevent mold growth and insulation damage.
Remove the wet insulation and allow it to air dry thoroughly before reinstalling it. Consider using a dehumidifier to expedite the drying process and ensure the insulation is completely dry before putting it back in place.

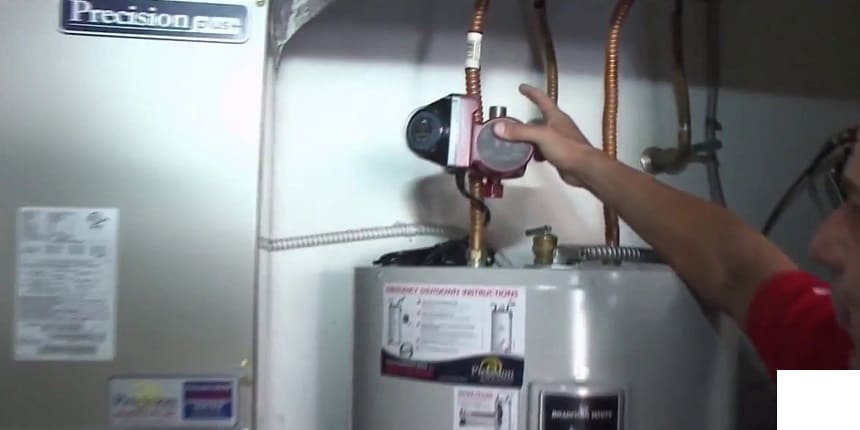
Step 1: Turning Off The Hot Water Heater
Before proceeding with drying out the insulation, it’s crucial to first turn off the water heater.
Shut off the power to the water heater using the circuit breaker or the power switch located on the unit. This precaution is essential to avoid any electrical hazards while working with wet insulation.
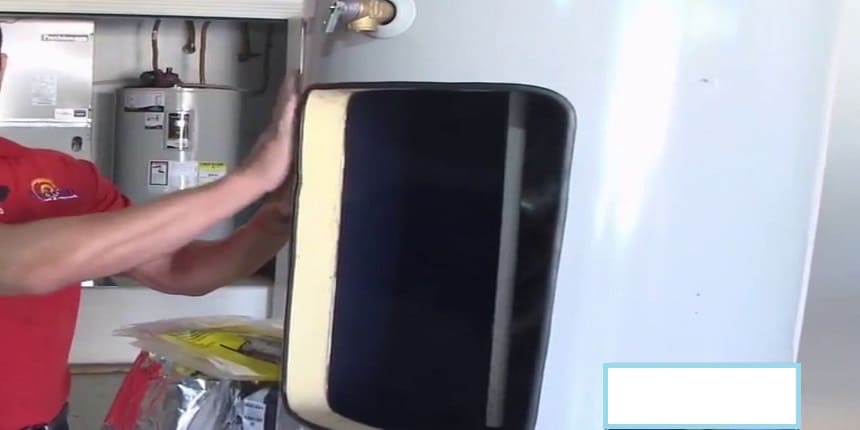
Step 2: Removing Wet Insulation
After safely turning off the water heater, the next step is to carefully remove the wet insulation.
Begin by taking apart the insulation covering the water heater, ensuring to wear gloves and protective gear to avoid skin contact. Dispose of the wet insulation properly to prevent mold and mildew growth.
Step 3: Air Drying Or Applying Heat
Once the wet insulation is removed, the next course of action involves thoroughly drying the insulation.
There are two effective methods to achieve this: air drying or applying heat.
Air Drying:
Place the wet insulation in a well-ventilated area, ideally outdoors, to allow natural air circulation.
Ensure the insulation is spread out to expedite the drying process. Regularly check for signs of mold or mildew during the air-drying phase.
Applying Heat:
If air drying isn’t viable, using a low-heat source such as a fan or a blow dryer on the lowest setting can help accelerate the drying process.
Carefully monitor the insulation to prevent overheating and potential fire hazards.
On the other hand, if you don’t want the hassle of drying we can replace the existing water heater insulation with new one. Check the link below to get a new one!
Check water heater insulation from here.
Find the Appropriate Water Heater Insulation
Explore various insulation options for your water heater! Proper insulation boosts energy efficiency, reduces heat loss, and helps lower utility bills. Find the ideal solutions to keep your water heater running effectively!
What Happens If An Electric Heater Gets Wet?
When it comes to handling wet water heater insulation, one of the primary steps is evaluating the water heater for leaks.
This crucial step allows homeowners to pinpoint the source of the water that caused the insulation to become wet, enabling them to take appropriate action to resolve the issue.
Checking For Leaks And Addressing Them
One of the key aspects of evaluating a water heater for leaks is meticulously checking for any signs of water leakage around the system.
Inspect the area surrounding the water heater for any visible puddles, dampness, or water stains. Also, pay close attention to the water supply lines and the base of the tank as these are common areas for leaks to occur.
1. Regularly inspect the water heater for any signs of leaks such as water puddles or dampness around the unit.
2. Check the water supply lines and the base of the tank for any visible signs of water leakage.
3. If any leaks are detected, promptly address them to prevent further damage to the water heater and the surrounding area.
Repairing Or Replacing Damaged Components
If leaks are identified during the evaluation, it is essential to promptly address them to prevent further damage.
This may involve either repairing or replacing damaged components to ensure the proper functioning of the water heater.
1. If leaks are found, inspect the components such as the pressure relief valve, fittings, and connections for any signs of damage.
2. For minor leaks, tighten loose fittings or connections, or replace damaged valves to resolve the issue.
3. If significant damage is observed, consider consulting a professional to assess whether the water heater requires repair or replacement.
What to Do If Water Heater Insulation Gets Wet – Replacing Insulation And Preventive Measures
When water heater insulation gets wet, it is important to take action promptly to prevent damage and ensure the efficient operation of your water heater.
Replacing insulation and implementing preventive measures are crucial steps to maintain the performance of your water heater and avoid further issues.
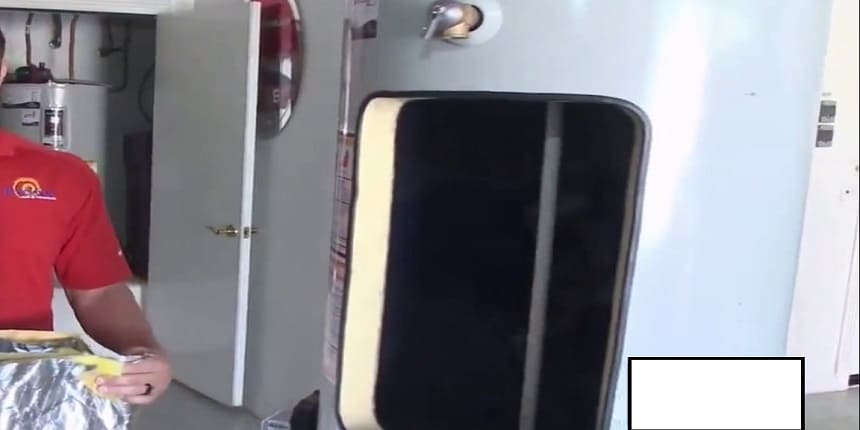
Installing New Insulation
When replacing the wet insulation in your water heater, follow these steps to ensure the process is done effectively:
- Turn off the power: Before starting the replacement process, make sure to turn off the power supply to the water heater to prevent any electrical hazards.
- Drain the water tank: Safely drain the water from the tank to access the insulation without any obstructions.
- Remove the old insulation: Carefully remove the wet and damaged insulation from the water heater, ensuring there are no remnants left behind.
- Install new insulation: Use high-quality insulation materials suitable for water heaters and securely install them to provide effective heat retention and prevent further moisture absorption.
- Turn on the power: Once the new insulation is in place, turn the power back on and monitor the water heater for proper operation.
Preventing Future Insulation Damage
To prevent future damage to your water heater insulation, consider implementing the following preventive measures:
- Regular insulation checks: Periodically inspect the insulation for any signs of moisture or damage, and promptly address any issues found.
- Maintain a dry environment: Ensure the area around the water heater is kept dry to prevent moisture from seeping into the insulation.
- Address any leaks: If there are any leaks in the water heater or surrounding pipes, fix them immediately to prevent water from reaching the insulation.
- Consider insulation wraps: Using insulation wraps designed specifically for water heaters can provide an additional layer of protection against moisture and heat loss.
Final Words
Dealing with wet water heater insulation requires prompt action to prevent further damage.
By carefully inspecting and drying the insulation, you can avoid potential risks and prolong the lifespan of your water heater.
Proper maintenance and regular checks can help prevent future issues, ensuring your water heater continues to function efficiently.