
Are you planning to install a water heater vent pipe but feel unsure where to start? Getting this part right is crucial for your safety and your home’s efficiency.
A properly installed vent pipe ensures harmful gases leave your house safely, preventing dangerous build-ups. You’ll learn simple steps and expert tips to install your water heater vent pipe correctly. By the end, you’ll feel confident handling the job or knowing exactly what to ask a professional.
Keep reading to protect your home and enjoy worry-free hot water!
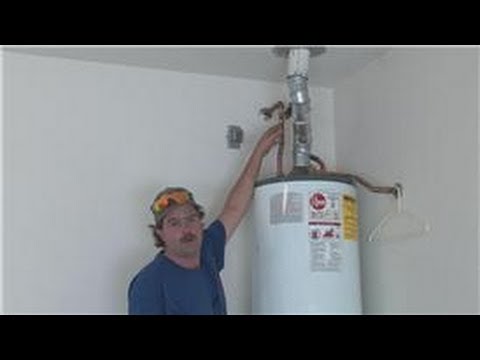
Credit: www.youtube.com
Choosing The Right Vent Pipe
Choosing the right vent pipe for your water heater is important for safety and performance. The vent pipe removes harmful gases and smoke from the heater. Picking the correct type and size ensures your system works well and stays safe. Understanding material options, sizing rules, and heater compatibility helps make the best choice.
Material Options
Vent pipes come in different materials. Common types include aluminum, galvanized steel, and PVC. Aluminum pipes resist rust and are lightweight. Galvanized steel is strong and durable but can corrode over time. PVC pipes are popular for high-efficiency heaters and are easy to install. Choose a material that fits your heater type and local codes.
Sizing Guidelines
The pipe size must match the water heater’s vent outlet. Too small pipes block gases and reduce efficiency. Too large pipes cause poor draft and venting problems. Measure the vent size on the heater before buying pipe. Follow manufacturer instructions and local building codes for sizing. Proper sizing keeps the system safe and efficient.
Compatibility With Heater Types
Different heaters need different vent pipes. Gas water heaters usually use metal pipes. High-efficiency or condensing heaters often use PVC or special plastic pipes. Check the heater’s manual for approved vent types. Using the wrong pipe can cause leaks or dangerous gas buildup. Always use vent pipes made for your heater model.
Planning The Vent Pipe Route
Planning the vent pipe route is an important step in water heater installation. A well-planned route ensures safe and efficient venting of gases. It also prevents problems like leaks and blockages. Careful planning saves time and money during installation and maintenance.
Distance And Clearance Requirements
Keep enough distance between the vent pipe and walls or ceilings. Check local codes for minimum clearance rules. The pipe must not touch combustible materials. Maintain a safe gap to prevent fire hazards. Proper clearance helps the vent work correctly.
Avoiding Obstacles
Plan the vent pipe path to avoid obstacles like beams and electrical wiring. Avoid sharp bends that can trap gases or debris. Use the shortest and straightest route possible. Clear routes improve airflow and reduce risks. Inspect the area carefully before installation.
Proper Slope For Drainage
Install the vent pipe with a slight upward slope toward the chimney or vent cap. This slope allows condensation to drain safely. Prevents water buildup inside the pipe. A good slope keeps the vent clear and working well. Follow manufacturer guidelines for the correct angle.
Installation Steps
Installing a water heater vent pipe requires careful steps to ensure safety and proper function. Each step must be done correctly to prevent leaks and allow gases to escape outside. The process involves securing the pipe, sealing the joints, and connecting the pipe to the vent hood. Follow these steps closely for a successful installation.
Securing The Pipe
Start by positioning the vent pipe along the planned route. Use metal straps or brackets to hold the pipe firmly in place. Secure the pipe every few feet to prevent movement. Make sure the pipe slopes slightly upward toward the outside. This helps gases flow out easily and stops rainwater from entering.
Sealing Joints
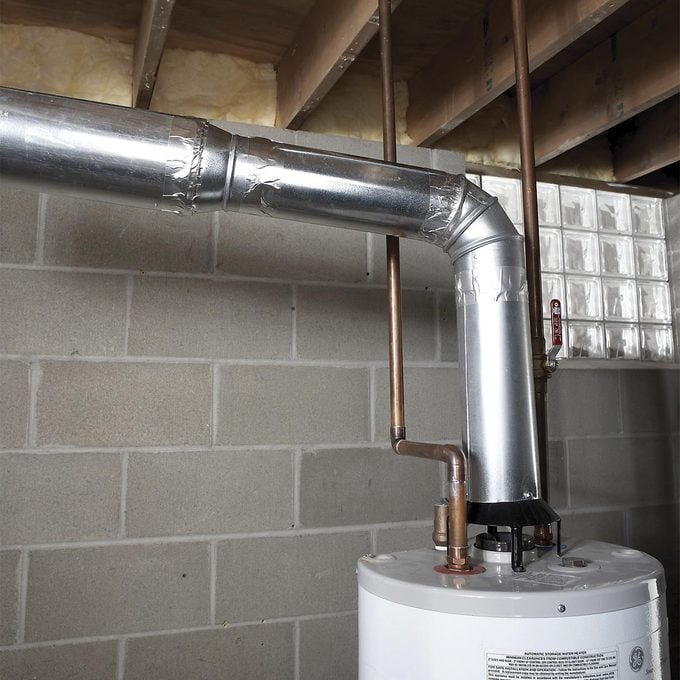
Join the pipe sections tightly to avoid leaks. Use high-temperature foil tape around each joint. Avoid using regular duct tape, as it cannot handle heat. Apply the tape smoothly, covering the entire seam. This seals the joints and keeps harmful gases from escaping inside the home.
Connecting To The Vent Hood
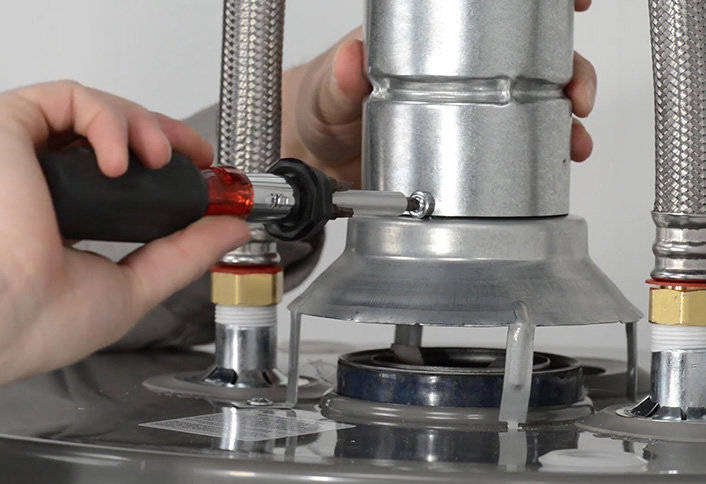
Attach the final pipe section to the vent hood outside the building. The vent hood protects the opening from rain and animals. Secure the connection with screws or clamps. Check that the vent hood points away from windows and doors. This directs exhaust gases safely away from living areas.
Safety Considerations
Safety is the top priority when installing a water heater vent pipe. Proper installation protects your home and family from harmful gases. It also ensures the water heater works efficiently and lasts longer. Understanding key safety points helps avoid risks and costly repairs.
Preventing Carbon Monoxide Leaks
Carbon monoxide is a deadly gas that comes from burning fuel. The vent pipe must carry these gases safely outside. Sealing all joints tightly stops leaks. Using the right materials also prevents cracks or holes. Regular checks ensure no gas escapes into your home.
Ensuring Adequate Ventilation
The vent pipe needs enough air to work well. Without proper ventilation, harmful gases build up indoors. The pipe should be clear of blockages and correctly angled. This allows smooth flow of exhaust gases. Good airflow lowers the risk of dangerous fumes inside.
Local Code Compliance
Every area has rules for vent pipe installation. These rules keep your home safe and legal. Following local codes means using approved materials and methods. Inspectors check these during home inspections. Meeting codes prevents fines and safety hazards.
Maintenance Tips
Proper maintenance of your water heater vent pipe is essential for safety and efficiency. Regular care helps avoid problems like leaks or blockages. It also extends the life of the vent pipe and your water heater.
Regular Inspections
Check the vent pipe at least twice a year. Look for rust, cracks, or loose connections. Make sure the pipe is securely attached and not sagging. Inspect the area around the vent for signs of moisture or soot. These signs can indicate poor ventilation or leaks.
Cleaning Procedures
Remove dust and debris from the vent pipe regularly. Use a brush or vacuum to clear any buildup inside the pipe. Avoid using water or harsh chemicals. Clean the vent cap outside to keep it free from leaves or nests. Clear vents improve airflow and prevent dangerous gas buildup.
Identifying Common Issues
Watch for unusual smells near the vent pipe. A strong gas odor may signal a leak. Listen for strange noises like hissing or rattling. These can indicate loose parts or blockages. Check for discoloration or rust on the pipe. These problems need prompt attention to prevent bigger issues.
Credit: www.coppertreepartners.com
Credit: inocolombia.com
Conclusion
Proper water heater vent pipe installation keeps your home safe and warm. It helps remove harmful gases and prevents leaks. Use the right materials and follow local codes carefully. Check the connections often to avoid problems. If unsure, ask a professional to help.
Good installation saves money and worry in the long run. Stay safe and enjoy hot water every day. Simple steps make a big difference. Don’t skip this important task. Your comfort depends on it.