
To replace the thermocouple in a Richmond water heater, first, turn off the gas supply and power. Next, remove the access cover to locate the thermocouple, unscrew it, and install the new one.
Richmond water heaters are popular for their reliability and efficiency. However, thermocouples can fail over time, leading to heating issues. A faulty thermocouple prevents the pilot light from staying lit, causing hot water shortages. Knowing how to replace this component can save time and repair costs.
This simple maintenance task can restore your water heater’s functionality. Proper care and timely replacement of worn parts ensure your system operates smoothly. Understanding the replacement process empowers homeowners to tackle minor repairs confidently. With the right tools and instructions, you can easily manage this task.

Credit: www.amazon.com
Page Contents
- 1 Identifying The Need For Replacement
- 2 Safety First
- 3 Tools And Materials
- 4 Accessing The Thermocouple
- 5 Removing The Old Thermocouple
- 6 Selecting The Right Replacement
- 7 Installing The New Thermocouple
- 8 Testing The Installation
- 9 Maintenance Tips
- 10 Troubleshooting Common Issues
- 11 Frequently Asked Questions
- 12 Conclusion
Identifying The Need For Replacement
Several signs indicate a failing thermocouple in your Richmond water heater. Look for fluctuating water temperature. If the water is too hot or too cold, this may mean trouble. A burning smell can also signal an issue. Other signs include the heater not igniting or frequent pilot light outages.
Ignoring these issues can lead to serious consequences. A faulty thermocouple might cause the water heater to stop working. This could lead to water damage from leaks or increased energy bills. In some cases, it can even pose a fire hazard.
| Signs of a Failing Thermocouple | Consequences of Ignoring Issues |
|---|---|
| Fluctuating water temperature | Water heater may stop working |
| Burning smell | Increased energy bills |
| Heater not igniting | Water damage from leaks |
| Frequent pilot light outages | Fire hazard |
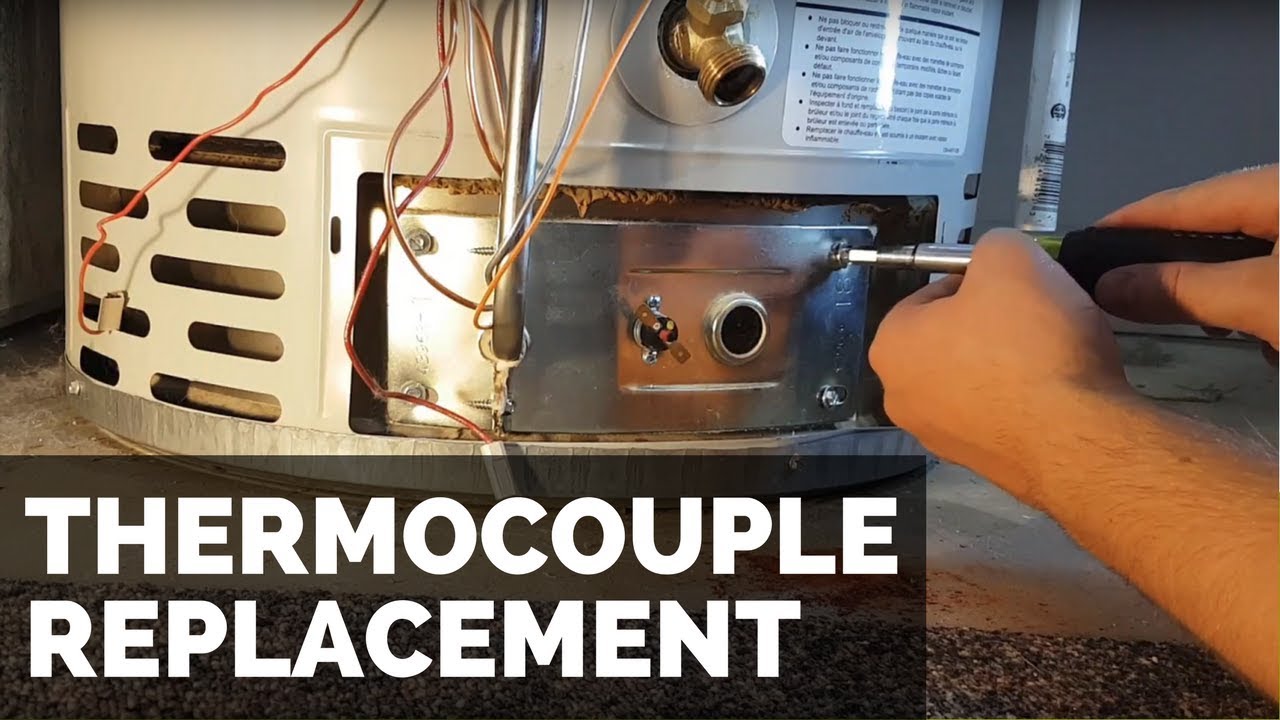
Credit: www.youtube.com
Safety First
Before starting any work, turn off the gas supply to your Richmond water heater. This step is crucial for your safety. Locate the gas shut-off valve and turn it to the off position. Check for any gas leaks by using soapy water. If bubbles form, there is a leak.
Always ensure the area is well-ventilated. Clear any flammable materials from around the heater. Keeping the workspace safe prevents accidents while replacing the thermocouple. Wear protective gear like gloves and goggles for added safety.
Follow these simple tips to ensure a safe environment:
- Turn off the gas supply.
- Check for gas leaks.
- Keep the area ventilated.
- Clear flammable materials.
- Wear protective gear.
Tools And Materials
To replace a thermocouple in your Richmond water heater, gather these tools and materials:
- Adjustable wrench
- Flathead screwdriver
- Replacement thermocouple
- Pipe wrench
- Safety gloves
- Cleaning cloth
These items can be found at local hardware stores or online retailers. Popular options include:
| Store | Website |
|---|---|
| Home Depot | homedepot.com |
| Lowes | lowes.com |
| Ace Hardware | acehardware.com |
Accessing The Thermocouple
Accessing the thermocouple is essential for proper water heater function. First, locate the thermocouple near the burner assembly. It is usually a small metal rod. This rod senses the flame’s heat.
To remove the burner assembly, turn off the water heater. Disconnect the gas supply carefully. Next, unscrew the burner assembly from its place. Gently lift the assembly to avoid damage. Check for any loose connections or debris while you are there.
Follow safety precautions while working on your water heater. Always ensure your workspace is well-ventilated. Wear gloves to protect your hands from sharp edges.
Removing The Old Thermocouple
Start by turning off the power to the water heater. This ensures safety during the process. Next, locate the thermocouple near the burner. Use a wrench to gently disconnect it from the gas valve.
Be careful not to damage any wires. A line wrench can help prevent rounding the nuts. After disconnecting, remove any screws holding the thermocouple in place. Check the pilot light area for any obstructions.
To make removal easier, keep the area clean and organized. Label the wires if necessary. This helps during reinstallation. Always wear safety gloves to protect your hands.
Selecting The Right Replacement
Choosing the right thermocouple for your Richmond water heater is crucial. Compatibility with your specific model is essential. Check the manufacturer’s specifications before purchasing a replacement. This ensures proper function and safety.
Quality and durability play a significant role in thermocouple selection. Opt for high-quality materials that resist wear and corrosion. A durable thermocouple lasts longer and maintains performance. This can save money on repairs and replacements.
Consider warranties offered by manufacturers. A good warranty indicates confidence in product quality. Read customer reviews to understand performance and reliability. This research helps in making an informed choice.
Installing The New Thermocouple
Start by turning off the power to the water heater. This prevents any accidents during the installation. Next, locate the old thermocouple. Carefully disconnect it from the gas valve.
Take your new thermocouple and position it. Ensure the tip is properly placed in the flame. Tighten the connections securely to avoid gas leaks. Check that the thermocouple is not too loose.
After that, reconnect the gas supply. Turn on the power to the water heater. Finally, test the system to ensure it works correctly.
Follow these steps to ensure a secure fit. A well-installed thermocouple enhances safety and efficiency.
Testing The Installation
Before starting, ensure the water heater is turned off. Check for any leaks around the unit. Make sure the thermocouple is properly connected. Inspect the wiring for any visible damage.
Next, confirm that the gas line is secure and does not have any blockages. Look for signs of corrosion on the heater parts. It’s vital to ensure that the area is well-ventilated.
After these checks, perform an initial ignition test. Turn on the heater and watch for any unusual sounds or smells. If everything seems fine, the installation is likely safe.
Maintenance Tips
Regular inspections are key to keeping your Richmond water heater safe and efficient. Check the thermocouple for any signs of wear. Clean the area around the heater to prevent dust buildup. Look for leaks or corrosion regularly.
Long-term care ensures your heater lasts longer. Schedule annual check-ups with a professional technician. Replace old parts promptly to avoid bigger issues. Always keep the heater’s manual handy for reference.
Troubleshooting Common Issues
Many homeowners face installation problems with their Richmond water heaters. Common issues include incorrect wiring and poor connections. Always check if the thermocouple is properly installed. A loose thermocouple can lead to heating issues.
Signs of installation problems may include water that does not heat properly. If you notice strange noises, that could be another sign. In these cases, it might be wise to call a professional. An expert can quickly identify and fix the problem. This can save time and money in the long run.
When unsure, asking for help is a good option. A professional will ensure everything works well. This way, you can enjoy a reliable water heater without worries.
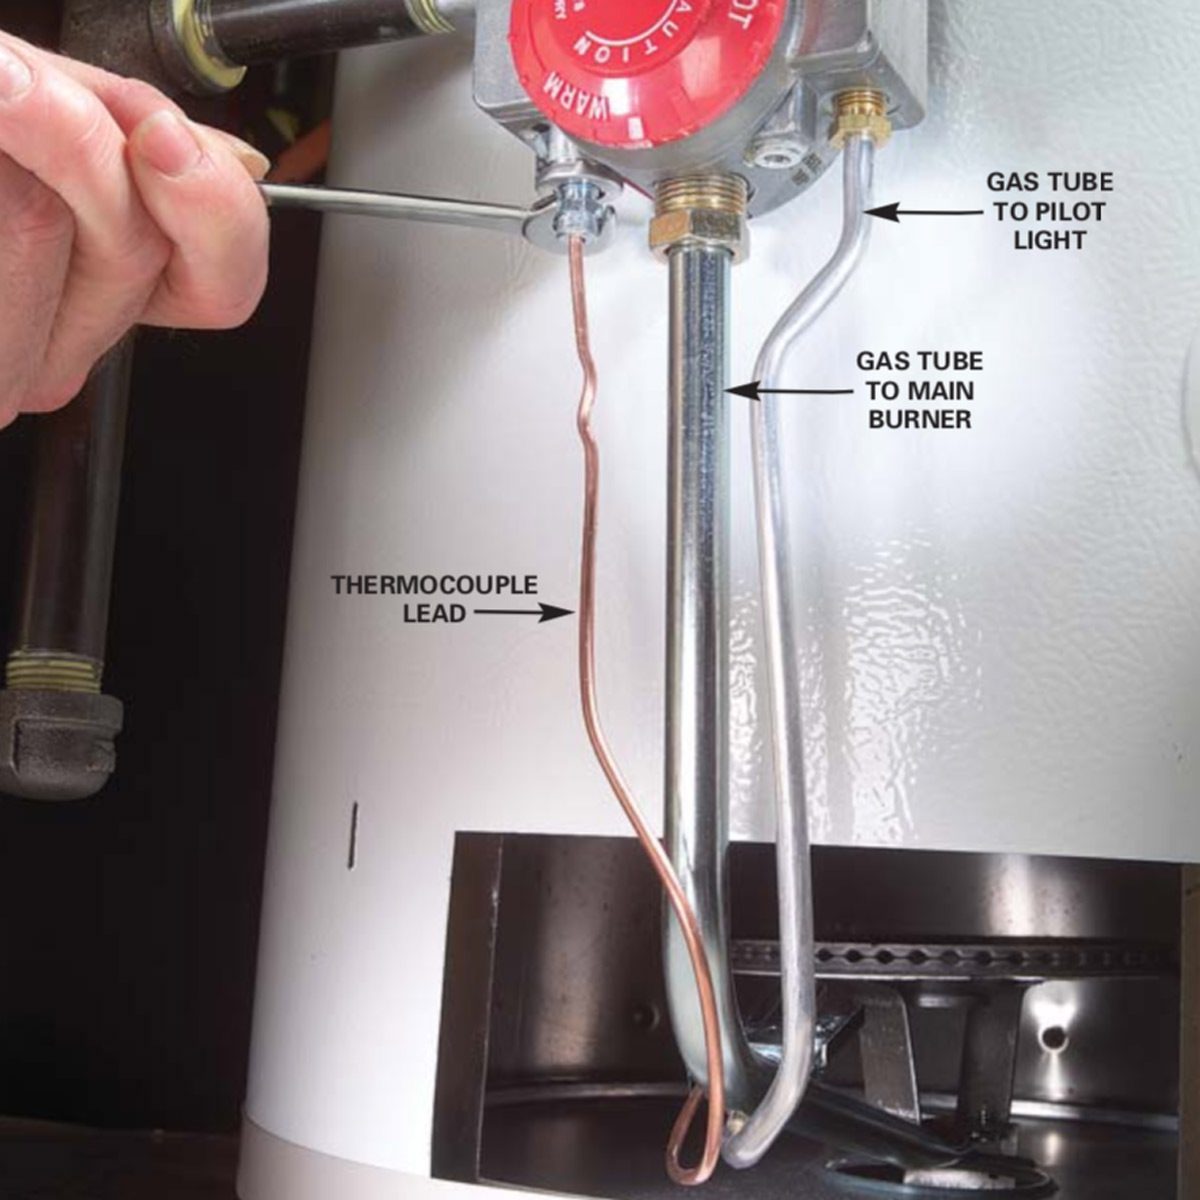
Credit: www.familyhandyman.com
Frequently Asked Questions
How Do I Know If My Thermocouple Is Faulty?
You can identify a faulty thermocouple by checking for inconsistent heating or pilot light issues. If the pilot light won’t stay lit, it may indicate a malfunction. Additionally, inspecting for discoloration or damage can help determine if it needs replacement.
Regular maintenance can prevent these problems.
What Tools Do I Need To Replace A Thermocouple?
To replace a thermocouple, you’ll need a wrench, screwdriver, and a replacement thermocouple. A multimeter can help test the thermocouple’s functionality before replacement. Having these tools on hand ensures a smooth and efficient replacement process. Always prioritize safety by turning off the gas supply first.
Can I Replace The Thermocouple Myself?
Yes, replacing a thermocouple is a manageable DIY task. Ensure you have the right tools and a replacement part. Follow the manufacturer’s instructions carefully for best results. If unsure, consulting a professional can provide peace of mind and ensure safety during the process.
How Often Should I Replace My Thermocouple?
A thermocouple typically lasts 3 to 5 years, but this can vary. Factors like usage frequency and water heater type can influence lifespan. Regular inspections can help identify wear and tear. If you notice signs of malfunction, consider replacing it sooner to maintain safe operation.
Conclusion
Replacing the thermocouple in your Richmond water heater can enhance its efficiency and safety. Regular maintenance ensures your unit operates smoothly. If you encounter issues, don’t hesitate to consult a professional. A well-functioning water heater provides comfort and peace of mind.
Take action today for better hot water tomorrow.